Make-Ahead Peanut Butter Chex Bars: Your Ultimate Snack Solution
In the bustling rhythm of daily life, finding a snack that's both satisfyingly delicious and incredibly convenient can feel like striking gold. Enter the humble yet mighty Peanut Butter Chex Bars — a no-bake wonder that promises to be your new go-to for everything from quick breakfasts to impressive party treats. Combining the irresistible duo of rich peanut butter and decadent chocolate with the delightful crunch of Chex cereal, these bars are more than just a snack; they're a nostalgic journey for your taste buds and a lifesaver for your busy schedule.
Imagine a treat that requires no oven, minimal cleanup, and delivers maximum flavor. That's the magic of these Easy No-Bake Peanut Butter Chex Bars: Sweet & Salty Treat. They capture the essence of childhood favorites while offering a sophisticated twist that appeals to all ages. Perfect for meal prep, road trips, school lunches, or simply enjoying with a quiet cup of coffee, their make-ahead nature ensures you always have a delightful bite on hand.
Why Make-Ahead Peanut Butter Chex Bars Are Your New Go-To Snack
The appeal of chex bars extends far beyond their delicious taste. Their make-ahead capability and inherent versatility make them an indispensable addition to any snack repertoire. Here's why they deserve a permanent spot in your kitchen:
- Unbeatable Convenience: True to their name, these are no-bake wonders. This means no preheating ovens, no waiting for things to rise, and significantly less cleanup. The preparation is straightforward, making them perfect for even the most novice bakers or those short on time.
- Flavor Harmony: The timeless combination of peanut butter and chocolate is celebrated for a reason. In these bars, it's elevated by a subtle pop of salt and a fantastic textural contrast from the crisp cereal. Each bite delivers a chewy, crunchy, and utterly satisfying experience.
- Versatility for Any Occasion: Whether you need a quick energy boost before a hike, a sturdy snack for a road trip, an easy dessert for a potluck, or just something sweet to tide you over between meals, peanut butter chex bars fit the bill. Their robust structure makes them travel-friendly, and their appealing taste ensures they're always a hit.
- A Touch of Nostalgia: For many, these cereal bars evoke memories of simpler times — a grown-up version of those beloved Kellogg's cereal treats from childhood. They offer that comforting, familiar sweetness that instantly brings a smile. For a deeper dive into this nostalgic appeal, check out our article on Classic Peanut Butter Chex Bars: A Grown-Up Childhood Treat.
- Excellent for Meal Prep: One batch yields numerous bars, making them ideal for weekly meal prepping. Store them in the fridge or freezer, and you'll have delicious, portion-controlled snacks ready to grab and go whenever hunger strikes.
Mastering the No-Bake Method: A Step-by-Step Guide
Creating these delightful peanut butter chex bars is surprisingly simple. The key lies in precise ingredient ratios and careful execution of each no-bake step. Follow this guide for perfectly set and irresistibly delicious bars every time.
1. Preparation is Key
Before you even begin to mix, ensure your workspace and pan are ready. Line a 9x13-inch baking pan with aluminum foil, leaving an overhang on the sides. This "sling" will make removing the set bars incredibly easy. Lightly coat the foil with nonstick cooking spray to prevent any sticking, especially with the gooey base and rich chocolate topping. Gather all your ingredients — honey, sugar, peanut butter, salt, Chex cereal, chocolate chips, and butter — to ensure a smooth process.
2. Crafting the Perfect Chewy Base
In a sturdy 4-to 6-quart Dutch oven or a large, heavy-bottomed pot, combine 1 1/4 cups of creamy peanut butter with honey and sugar. Place the pot over medium heat, stirring frequently. The goal here is to just bring the mixture to a gentle boil. This process helps dissolve the sugar and creates a sticky, cohesive binder for the cereal. Once it begins to boil, remove it from the heat and stir in the salt until everything is fully combined. The salt is crucial here; it perfectly balances the sweetness and enhances the peanut butter flavor.
3. Incorporating the Cereal
The next step is to add your chosen Chex cereal directly into the pot with the warm peanut butter mixture. Stir gently but thoroughly until every piece of cereal is evenly coated. This ensures that your chex bars hold together beautifully and that each bite has that satisfying crunch and flavor. For best results, work relatively quickly while the mixture is still warm and pliable.
4. Setting the Foundation
Transfer the coated cereal mixture into your prepared 9x13-inch pan. Using the back of a spoon or a piece of wax paper (to prevent sticking to your hands), spread and pack the mixture into an even, firm layer across the bottom of the pan. The firmer you press, the more cohesive your bars will be, preventing crumbling when cut. Set the pan aside to cool slightly while you prepare the topping.
5. The Decadent Chocolate Topping
While the base cools, prepare the luscious chocolate layer. In a medium microwave-safe bowl, combine your chocolate chips, an additional 1/3 cup of peanut butter, and butter. Microwave on high for 1 to 1 1/2 minutes, stirring every 30 seconds. This gradual melting prevents the chocolate from burning and ensures a smooth, glossy consistency. The added peanut butter and butter in the topping make it extra creamy and easy to spread, preventing it from cracking when chilled.
6. The Final Chill
Pour the melted chocolate mixture evenly over the cereal base in the pan, spreading it with a spatula to cover completely. Once topped, transfer the pan to the refrigerator. Chill the bars for at least 1 hour, or until the chocolate topping is fully set and firm. If you're in a time crunch, a stint in the freezer for about 30 minutes can speed up the setting process.
7. Slice and Serve
Once thoroughly chilled, use the foil overhang to carefully lift the entire slab of peanut butter chex bars out of the pan. Place it on a cutting board and slice into your desired bar size — squares, rectangles, or even smaller bites for a party. Store any leftovers in an airtight container at room temperature for up to 5 days, or longer if refrigerated.
Elevate Your Chex Bar Game: Expert Tips & Variations
While the basic recipe for chex bars is fantastic on its own, there are countless ways to customize and enhance them to suit your preferences. Here are some expert tips and creative variations to take your snack guide to the next level.
Choosing Your Chex
The original recipe often calls for Rice Chex or Corn Chex, but don't limit yourself! Peanut Butter Chex cereal exists and can intensify the peanut butter flavor significantly, creating an even richer experience. Feel free to mix and match different Chex varieties for a unique texture and flavor profile. Wheat Chex can also add a hearty, nutty note.
The Perfect Peanut Butter
For the base, creamy peanut butter works best as it creates a smoother, more consistent binder. However, if you love an extra textural element, you could try using a blend of creamy and crunchy. When using natural peanut butter, ensure it's well-stirred to prevent separation, and be aware that its consistency might be thinner, potentially requiring a slight adjustment to the honey/sugar ratio or a bit more chilling time.
Salt is Your Secret Weapon
Do not skip the salt! A subtle pop of salt in both the base and potentially a sprinkle of flaky sea salt over the chocolate topping elevates the entire flavor profile, contrasting beautifully with the sweetness of the chocolate and peanut butter. It brings out the deeper nutty notes of the peanut butter.
Creative Add-Ins & Toppings
This is where you can truly make these chex bars your own:
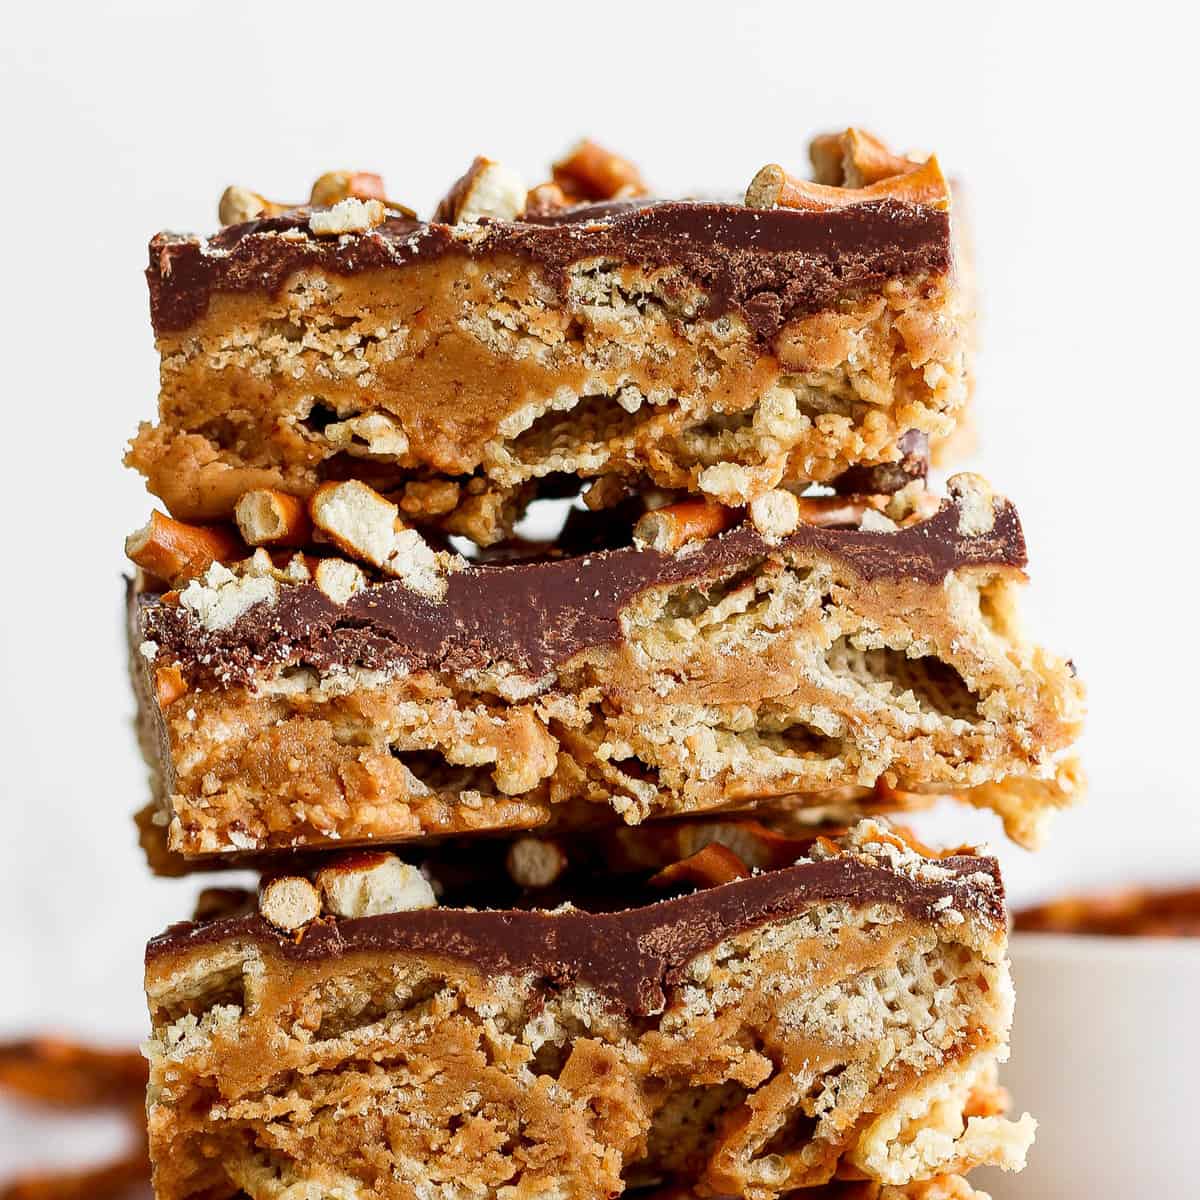
- Pretzel Perfection: For an irresistible sweet and salty crunch, crush about 1 cup of pretzels and sprinkle them over the melted chocolate topping before chilling. The salty, savory pretzel bits are a game-changer!
- Nutty Additions: Fold in chopped roasted peanuts, pecans, or almonds into the cereal mixture for added crunch and flavor.
- Chocolate Varieties: Experiment with different types of chocolate for the topping — milk chocolate, dark chocolate, white chocolate, or even a swirl of two!
- Colorful Fun: For parties or holidays, add sprinkles to the wet chocolate topping.
- Spice it Up: A pinch of cinnamon or a dash of vanilla extract in the peanut butter base can add another layer of warmth and complexity.
Storage Solutions for Long-Lasting Freshness
One of the best aspects of make-ahead peanut butter chex bars is their excellent shelf life. Store them in an airtight container at room temperature for up to 5 days. For longer freshness, keep them in the refrigerator for up to 2 weeks. They're also freezer-friendly! Once completely set and sliced, place the bars in a single layer in a freezer-safe bag or container, separating layers with parchment paper. They will stay fresh for up to 3 months. When ready to enjoy, simply let them thaw at room temperature for a few minutes or enjoy them straight from the freezer for a delightful chewy treat.
Conclusion: Your New Favorite Make-Ahead Snack Awaits
From their effortless no-bake preparation to their delightful combination of peanut butter, chocolate, and crisp cereal, these Peanut Butter Chex Bars are truly the ultimate make-ahead snack. They deliver on convenience, flavor, and versatility, making them a perfect choice for busy individuals, families, and anyone who appreciates a good, wholesome treat. So go ahead, gather your ingredients, follow these simple steps, and prepare to fall in love with your new favorite snack solution. Happy snacking!
